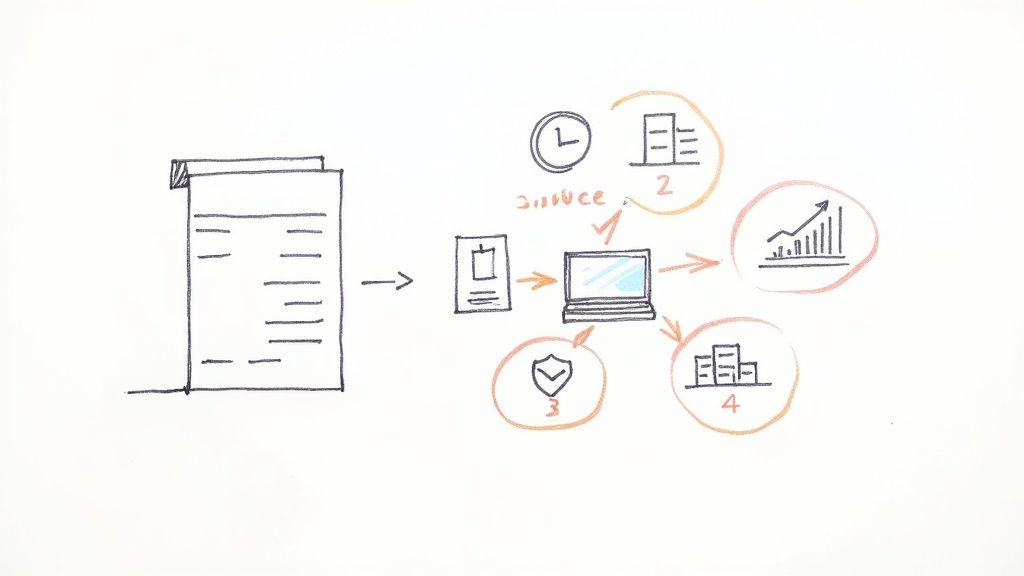
Checklist automation is a fancy term for something pretty simple: using software to automatically create, assign, and track checklists based on specific triggers. When you hear "checklist," you probably picture a simple to-do list. For a long time, that's all they were—notes scribbled on paper or maybe a basic spreadsheet. But that old-school view completely misses the power you unlock when you bring automation into the picture.
Checklist automation isn't about just making a better to-do list. It's about building a reliable, repeatable system for your core operations. It turns a passive guide into an active engine that drives your processes forward, all without someone having to manually poke and prod it along.
Why Checklist Automation Is More Than a To-Do List

Think about all the recurring work you do—onboarding a new client, kicking off a project, or even publishing a blog post. Manual checklists for these tasks are where things fall through the cracks.
The Problem with Manual Checklists
The hidden costs of doing things by hand are bigger than you think. Manual lists are magnets for human error. Steps get missed, critical details are forgotten, and consistency goes right out the window.
Imagine onboarding a new client the old way. One person might forget to request key documents. Someone else delays sending the welcome packet. The result? A messy, unprofessional first impression that's hard to recover from.
The real issue with manual systems is that they depend entirely on human memory and diligence for every single step, every single time. Automation shatters that dependency, establishing a baseline of quality that actually scales as you grow.
This manual grind also eats up an incredible amount of time. Your team loses hours to dull admin work: copying and pasting info, chasing people with reminder emails, and updating project statuses. That’s low-value work keeping skilled people from focusing on what really moves the needle. To see the bigger picture, it helps to understand the key benefits of workflow automation that drive this entire concept.
Making Automation Accessible
Not too long ago, building these kinds of automated systems required custom code and a team of developers, which put it out of reach for most businesses. That's not the world we live in anymore.
Modern no-code and low-code tools have completely changed the game, empowering anyone to design and build powerful processes.
- Databases like Airtable: This is the "brain" of your operation. You can build structured, flexible master checklist templates that are easy to manage and update. For example, you could have a base where one table holds all possible "Client Onboarding" tasks, and another table holds different "Client Types." You can then link these to create unique checklist templates for each type of client.
- Integration tools like Zapier: Think of this as the nervous system. It connects all your apps and triggers actions automatically. When a deal closes in your CRM, Zapier can instantly spin up a new onboarding checklist in your project tool.
- Project managers like ClickUp or SmartSuite: This is where the work gets done. These tools provide the framework for executing the tasks, assigning them to the right people with clear deadlines. For instance, when Zapier creates the checklist in ClickUp, a task like "Schedule Kick-off Call" can be automatically assigned to the designated Account Manager.
This combination of tools lets you build incredibly sophisticated workflows without writing a single line of code. And businesses are catching on. The process automation market, which heavily features checklist automation, was valued at around USD 7.78 billion in 2025. It’s expected to explode to nearly USD 17.18 billion by 2030, which tells you everything you need to know about where things are headed.
Choosing Your Ideal Automation Toolkit
Alright, let's talk tools. The first step in setting up any solid checklist automation is picking the right software. It's really tempting to hunt for that one perfect platform that does it all, but I’ve learned from experience that the best systems are almost always a combination of specialized apps that work together.
Your real goal isn't to find a single "do-everything" tool. It's to build your own custom "stack" that fits your team's unique workflow and how comfortable they are with new tech. Think of it like putting together a great sound system: you pick the best receiver for power, the best speakers for sound, and the best turntable for vinyl. Each piece is chosen because it excels at its specific job. Your automation toolkit should be built the same way.
The Core Components of Your Stack
Most of the powerful checklist automations I’ve built rely on three distinct types of tools. Each one handles a different part of the process. Once you understand these categories, you'll see exactly how the pieces fit together to create a smooth, hands-off operation.
The Brain (Data & Templates): This is where your master checklists and all their variations live. You need a flexible, database-like tool to store and manage your templates—not just a simple list, but a structured repository of tasks, dependencies, and all the variables that go into a project. For example, using Airtable, you can store a master list of "New Hire Onboarding" tasks, complete with fields for which department the task applies to.
The Hands (Execution & Management): This is your project or task management software. After a checklist is automatically generated, this is the environment where your team actually does the work, ticks off tasks, and collaborates. For instance, a new onboarding checklist could be created as a new list in ClickUp, with each task pre-assigned and given a due date.
The Nerves (Integration & Triggers): This is the "glue" that holds everything together. An integration platform watches for triggers in one app (like a new sale in your CRM) and then kicks off actions in others (like creating a project from your template). For example, a Zapier workflow can watch for a "New Employee" record being added to your HR system and use it to trigger the creation of their onboarding checklist.
A classic mistake I see all the time is trying to force one tool to do everything. Using a project manager as a database, for instance, usually ends up creating a mess of disorganized data and brittle automations that break the moment something changes. A well-designed stack plays to the strengths of each component.
Flexible Databases for Master Checklists
Your master checklist templates need a home that's both structured and easy to change. This is precisely where tools like Airtable really shine. Airtable is basically a spreadsheet on steroids, giving you the raw power of a relational database but with a friendly, visual interface that anyone can pick up.
For instance, you could set up an Airtable base for "New Client Onboarding." Each row in that base could represent a different kind of onboarding checklist—maybe one for a 'Standard Package' and another for an 'Enterprise Package.' Inside each, you can have dozens of predefined tasks with fields for due dates, assigned roles, and special notes. Because you can link records and use formulas, Airtable becomes incredibly powerful for managing complex, multi-stage templates.
Project Managers for Getting Work Done
Once your automation spits out a new checklist, the actual work needs to be assigned and tracked somewhere. That’s the job of dedicated project management platforms like ClickUp or SmartSuite. These tools are built from the ground up for execution.
When a trigger fires, your integration tool can create a brand new project or task list in ClickUp, pulling all the right tasks straight from your Airtable template. Team members get instant notifications, see their assigned work on a timeline or kanban board, and can collaborate right where the work is happening. This keeps the day-to-day execution totally separate and clean from your master template database. Some platforms even have their own document features, but for total control over branding and complex data, it's often better to automate document generation with a specialized tool.
Integrators That Connect Everything
The real magic happens when you tie all these platforms together. Zapier is the undisputed leader here, acting as a universal translator between thousands of different apps.
Just imagine this scenario: your sales team closes a new deal in your CRM. You can build a "Zap" that is triggered by this event. It can instantly:
- Find the correct checklist template in Airtable based on the deal size or type.
- Create a new, fully populated project in ClickUp using that template.
- Post a notification in a specific Slack channel to let the project team know it's time to get started.
This whole sequence unfolds in seconds, with zero manual input.
For teams with more technical chops, connecting systems directly via API (Application Programming Interface) offers even more power and customization. This allows you to build deeply integrated, proprietary workflows that are perfectly tailored to your business. And tools like Glide or Noloco even let you build simple, mobile-friendly apps on top of your data, making your checklists accessible from anywhere.
Comparing Popular Checklist Automation Tools
Choosing the right tools for your stack can feel overwhelming, so here’s a quick comparison to help you find the best fit based on what you’re trying to accomplish.
Ultimately, the best stack is the one that solves your specific problems. Start with one piece of the puzzle—like organizing your templates in Airtable—and build from there. You'll be surprised how quickly you can create a powerful system that saves you countless hours.
Your First Automated Checklist: A Real-World Walkthrough
Theory is great, but there’s nothing like getting your hands dirty. Let's walk through building your first automated workflow. This is where the real "aha!" moment happens and the power of checklist automation clicks into place.

The screenshot above shows a simple but powerful idea: a trigger (a new row in a Google Sheet) creates an action (a new card in Trello). This "trigger-action" recipe is the foundation for almost any automation you can dream up.
We’re going to tackle a classic, high-impact scenario: automating the client onboarding checklist. It's the perfect candidate for automation because it’s something you do over and over, it’s critical for making a great first impression, and it's loaded with tiny steps that are dangerously easy to forget.
Our tools of choice for this build will be Airtable, which will act as our "master template" database, and Zapier, the glue that connects everything and makes it work.
Step 1: Design the Master Checklist in Airtable
Before you can automate a single task, you need a blueprint. Your master checklist is that blueprint, and Airtable is the perfect place to build it. Don't just think of this as a simple to-do list; you're creating a structured database of every single action required for a flawless client onboarding.
First, create a new base in Airtable and call it something intuitive, like "Client Onboarding." Inside that base, create a table named "Master Checklist Tasks." Each row in this table will be a unique task.
Now, let's set up the columns (or fields) you'll need:
- Task Name: A short, clear description of the action (e.g., "Send Welcome Email," "Schedule Kickoff Call").
- Task Description: A bit more detail on what needs to be done, so there’s no confusion for the person assigned.
- Responsible Role: This is a key part. Assign it to a role ("Account Manager," "Project Lead"), not a specific person. This keeps your automation flexible even as team members change.
- Due Date Offset (Days): A simple number that dictates the deadline. For example, 0 means the task is due on the project's start date, -5 means five days before, and 7 means a week after.
- Onboarding Phase: A single-select field to categorize tasks into logical groups like "Pre-Kickoff," "Week 1," or "Project Setup."
Setting up your tasks this way transforms a static list into a dynamic template. When you eventually generate a real checklist for a new client, your automation can use these rules to calculate real due dates and assign tasks correctly. You can see how this approach could turn an example of a client onboarding checklist from a simple document into an active, intelligent system.
The "Due Date Offset" field is the secret sauce here. It completely decouples your template from specific calendar dates. This makes the entire checklist reusable for any client, at any time, with deadlines that automatically adjust to the project's unique timeline.
Step 2: Set Up the Automation Trigger in Zapier
With your master checklist built in Airtable, it's time to bring it to life with Zapier. The goal is simple: every time you sign a new client, a personalized checklist should be generated automatically.
A common trigger for this is when a deal is marked as "Won" in your CRM. So, in Zapier, your trigger step will be something like "New Deal in Stage in HubSpot." You’ll configure it to watch for any deal that moves into your "Closed Won" stage. Another practical example: you could use a new row in a specific Google Sheet as a trigger. When your sales team adds a new client's details to the sheet, the automation kicks off. Think of this as the starting pistol that fires off your entire onboarding automation.
This kind of process automation is gaining serious traction. While 58% of organizations are still in the early stages of adopting technologies like Robotic Process Automation (RPA), employee resistance is surprisingly low—only 17% report any pushback. Why? Because teams quickly realize this tech isn't about replacing them; it's about eliminating tedious work and letting them focus on what matters.
Step 3: Automate Task Creation and Notifications
Once the trigger fires in Zapier, the real magic happens in the "actions" that follow. This part might seem complex, but it's really just a series of simple, logical steps that do the heavy lifting for you.
First, you'll add an action step in Zapier to "Find Many Records" in Airtable. This tells Zapier to grab all the task rows from your "Master Checklist Tasks" table. Instantly, your workflow has a complete list of every single task needed for onboarding.
Next, you'll use one of Zapier's most powerful features: Looping. For each task it just found in Airtable, the loop will perform a sequence of actions:
- Create a Task in Your Project Tool: The loop will create a new task in whatever you use for project management (like ClickUp, Asana, or Trello). It will pull the task name and description directly from the Airtable record.
- Calculate the Due Date: Using a "Formatter" step, Zapier will take the project start date (which you can pull from your CRM trigger) and add the "Due Date Offset" value from Airtable. This creates a specific, dynamic deadline for every single task.
- Assign the Task: Based on the "Responsible Role" field from Airtable, you can use conditional logic (an "Only continue if..." filter) to assign the task to the right person. If the role is "Account Manager," the task goes to Jane. If it's "Project Lead," it goes to John.
- Send a Slack Notification: To keep everyone in the loop, the final step can post a message to a dedicated Slack channel like
#new-clients. The message can summarize the new task, who it’s for, and when it’s due, giving the whole team instant visibility.
By stringing these simple steps together, you've just built a bulletproof workflow. It takes a single event—a closed deal—and instantly creates a complete, assigned, and scheduled project plan. This is what effective checklist automation is all about: turning a manual, error-prone headache into a reliable system that just works.
Advanced Automation for Maximum Efficiency
So, you’ve built your first automated checklist. You’ve had a taste of what’s possible, and now you’re ready for the really powerful stuff. This is where we move beyond simple "trigger-and-create" workflows and start building a system that's genuinely intelligent and adaptive.
Advanced checklist automation is where your processes begin to think for themselves, handling complexity and exceptions without needing you to step in. It’s the difference between saving a little time and creating a truly self-sufficient operational engine for your business. Instead of just firing off a generic checklist, your system can now react to specific situations, route tasks for critical approvals, and keep the whole team in the loop automatically.
Introducing Conditional Logic
The magic ingredient for advanced automation is conditional logic. This gives your workflow the power to make decisions on its own, based on the data it receives. No more rigid, one-size-fits-all checklists. The system generates a custom set of tasks that are perfectly suited to the situation at hand.
Think of it as giving your processes an "if this, then that" superpower.
A classic example I see all the time is tiered client onboarding. Not all clients are the same, so why should their onboarding process be?
- If a new client's contract is "Enterprise" (data pulled from a field in Airtable), then the automation adds tasks for a deep legal review and a security audit.
- If the contract is "Standard," then those tasks are skipped entirely, keeping the process lean and moving quickly.
You can build this directly into tools like Zapier using its "Paths" feature. One path handles your ‘Enterprise’ flow, while another manages the ‘Standard’ one. Based on the data from your CRM trigger, the system automatically picks the right path every single time.
The goal here is to build one master automation that can handle multiple scenarios. This stops you from getting bogged down managing dozens of slightly different workflows, making your entire system more robust and much easier to maintain.
Building Multi-Step Approval Workflows
Let's be honest: some processes just need a human stamp of approval before they can move forward. A junior designer's work might need a manager’s sign-off, or a purchase request has to go through the finance department. Trying to manage these approvals manually is a classic bottleneck—a mess of email chains, missed messages, and constant follow-ups.
This is exactly what multi-step approval automation is designed to fix. You can build workflows that deliberately pause at critical points, waiting for a specific person to give the green light.
Picture a content publishing checklist in a tool like ClickUp:
- A writer finishes the "Drafting" task, changing its status to "Ready for Review."
- A native ClickUp automation sees this status change and instantly assigns the next task, "Editorial Review," to the editor.
- At the same time, it pings the editor on Slack with a link to the doc, asking for their approval.
- Only after the editor marks their task as "Complete" does the workflow continue, creating the "SEO Optimization" task and assigning it to the marketing specialist.
This creates a completely airtight process where nothing falls through the cracks. It also leaves a crystal-clear audit trail of who approved what and when—something that's invaluable for accountability. This is a fundamental piece of building a complete document workflow automation system.
Integrating Real-Time Progress Updates
How much time does your team waste in status update meetings? Advanced automation can give you most of that time back by pushing real-time progress updates to the place your team already lives: Slack.
Instead of people having to pull information by logging into a tool, the information gets pushed to them. When a major milestone is hit—like the "Kickoff Call Scheduled" task in an onboarding checklist being completed in ClickUp—your automation can post a quick, celebratory message to your #new-clients channel in Slack.
This keeps everyone informed, builds momentum, and saves countless hours. The impact is huge. Research shows that over 90% of employees report a boost in productivity from automation, and companies that embrace it see operating costs drop by an average of 22%.
Using Webhooks and APIs for Custom Jobs
When you need to connect your checklists to a tool that doesn't have a direct integration, you can turn to webhooks and APIs. A webhook is basically a way for one app to send real-time information to another app the very moment something happens.
For instance, you could set up Stripe to send a webhook notification every time a customer's payment goes through. That webhook can trigger a Zapier workflow that instantly finds the customer in your Noloco client portal and updates their status to "Paid," unlocking new content for them.
The client pays, and their project access is granted within seconds. It’s a seamless, professional experience, powered entirely by automation.
Embarking on a checklist automation project is exciting. But building a system that actually lasts means knowing which traps to avoid. Too many well-intentioned projects stumble over the same few hurdles. I've seen these pitfalls firsthand while helping businesses set up their own workflows, and I want to share the hard-won lessons so you can sidestep them entirely.
The most common mistakes aren't really about the tech. They're strategic. It usually boils down to over-complicating things, ignoring the quality of your data, or failing to bring your team along for the ride.
The Over-Engineering Trap
It's so easy to get carried away. You try to design an automation so intricate, so perfect, that it becomes brittle and impossible to manage. You account for every single edge case, building a rigid process that shatters the moment a real-world scenario deviates from your master plan. This is a classic rookie mistake.
The solution? Start simple and iterate. Seriously. Don't try to boil the ocean on day one.
Instead of trying to build a massive, all-encompassing workflow, just pick one small, high-impact part of the process. Automate that single piece, get it working reliably, and then build on it. For example, instead of automating the entire 50-step client onboarding, start by just automating the creation of the project folder in Google Drive and sending the welcome email. Once that works perfectly, add the next step. This incremental approach lets you learn and adapt as you go, creating a system that's both powerful and flexible enough for the real world.
A good automation is like a well-tended garden, not a concrete sculpture. It needs room to grow and change. If your first version feels a bit too simple, you're probably on the right track.
Letting Bad Data Break Your System
Your automations are only as good as the data that feeds them. If your triggers rely on inconsistent or messy information, your entire workflow will be unreliable. It’s the classic "garbage in, garbage out" principle, and it will absolutely wreck your automations.
Imagine your trigger for a new project checklist is a "Project Type" field in your CRM. What happens when your team enters values like "Web Design," "webdesign," and "Web design project" interchangeably? Your automation will fail to fire consistently, and you'll be left wondering why.
The fix here is disciplined data hygiene.
- Use Validated Fields: Whenever you can, use dropdowns, single-select fields, or linked records in your data source like Airtable or SmartSuite instead of free-text fields. This forces consistency from the start.
- Establish Clear Naming Conventions: Create a dead-simple guide for your team on how to name deals, projects, and clients. Make it easy to do the right thing.
- Regularly Audit Your Data: Spend 15 minutes a week just cleaning up key fields in your source apps. It’s a tiny investment that pays huge dividends in reliability.
Failing to Get Team Buy-In
You can build the most elegant checklist automation on the planet, but if your team doesn't use it, it’s completely worthless. Resistance rarely comes from a fear of technology. More often, it stems from a feeling of being left out of the process or not really understanding why this change is happening.
To actually drive adoption, you have to involve your team from the very beginning. They're the experts in the process you’re trying to automate, after all.
Ask them about their biggest headaches. What manual tasks do they absolutely hate doing? Where do things consistently fall through the cracks? Frame the automation as a tool that makes their job better, not just different. Show them how it frees them from tedious admin work so they can focus on what really matters.
A great way to show immediate value is by automating a process they all feel, like employee onboarding. Giving them a solid starting point, like a free employee onboarding checklist template, can kickstart the conversation and show them exactly how automation makes everyone's life easier.
Still Have a Few Questions?
Diving into checklist automation is exciting, but it's totally normal to have a few questions before you jump in. I get these all the time, so let's walk through the most common ones to clear up any final uncertainties.
"Do I Really Need to Be a Coder to Do This?"
Not at all. This is probably the biggest misconception out there. Modern no-code platforms are specifically built for business users, not developers.
Tools like Zapier, ClickUp, and Airtable use intuitive, drag-and-drop interfaces. You're not writing code; you're just connecting dots and telling your apps what to do using simple "if this happens, then do that" logic. This entire guide focuses on these tools for that very reason—they make powerful automation accessible to everyone.
"What’s the Difference Between My Project Manager and an Automation Tool?"
That's a fantastic question, and understanding the distinction is key to building a truly efficient system. The two are designed to work together, each playing a different role.
Project Management Tools (like ClickUp or Asana): Think of these as your digital workspace. They're where your team actually does the work. Their built-in automations are perfect for actions inside that workspace, like "When a task's status changes to 'Complete,' notify the project lead."
Dedicated Automation Tools (like Zapier or Make): These are the bridges between all your different apps. They orchestrate the handoffs. For instance, an automation tool can see a new sale in Shopify, create a new client in your CRM, and then spin up a new project in Asana using a template.
The best setups use both. Your automation tool gets the ball rolling by connecting different systems, and your project manager handles the internal execution from there.
Think of it this way: your project manager is the workshop where the work gets done, while the automation tool is the robotic assembly line that delivers the raw materials and instructions exactly when they're needed.
"How Do I Pick the Right Process to Automate First?"
My advice? Start small and aim for a quick win. Don't try to boil the ocean by automating a super complex, creative process right out of the gate.
Look for a task that is high-frequency, repetitive, and rule-based. Is there something your team does every single day, or multiple times a week, in the exact same way? Client onboarding checklists, content publishing workflows, or new hire paperwork are classic examples. For example, if your team manually creates a new folder structure in Google Drive for every new client, that's a perfect first automation candidate.
The sweet spot is a process that's not only repetitive but also a bit of a pain point. Automating something that eats up a lot of manual time will immediately prove the value of checklist automation and build the momentum you need to tackle bigger projects.
"Isn't Checklist Automation Going to Be Expensive?"
It really doesn’t have to be. In fact, you can get your first few automated workflows up and running without spending a single dollar.
Most of the top-tier tools, including Airtable and Zapier, offer surprisingly robust free plans. These aren't just flimsy trials; they're powerful enough to let you build, test, and validate your ideas. You can see the benefits firsthand before ever pulling out a credit card.
Of course, as your needs grow, you can upgrade to an affordable paid plan. But the key thing to remember is the ROI. The investment almost always pays for itself many times over in hours saved, errors avoided, and a more productive, less-stressed team.
Ready to stop wasting time on manual document creation? DocsAutomator turns your data into perfectly formatted Google Docs or PDFs automatically. Start for free and generate your first 20 documents on us!